
REVIEW · 3-HOUR EXPERIENCES
3 Hours Wheel Throwing Basic Ceramic Class
Book on Viator →Operated by Local Experiences · Bookable on Viator
Wheel throwing sounds simple. Then the clay sticks to your confidence. In Ubud, this 3-hour basic ceramic class has you learning wheel throwing with the hand-technique and shaping what you want, right in a working factory setup. I like the fact you’re not just observing—you work the clay from scaling and kneading through forming on the wheel, using real tools and machines. I also like the payoff: you choose the best three creations to take home. One consideration: the firing and glazing for final pieces takes time, and baking/combustion isn’t included—so your finished ceramics are a later souvenir, not an instant one.
This is a private class for your group, with an apron and bottled water provided. You’ll also get materials (including coloring materials if you want to vary your look), and you can experiment beyond your final picks. The main thing to plan is timing: the session is about 3 hours, but the completed ceramics can take 1 to 4 weeks depending on the glazing and combustion process.
In This Review
- Key highlights worth your time
- Wheel Throwing in Ubud: Why This Class Feels Practical
- What Happens During the 3 Hours (From Kneading to a Real Form)
- Clay scaling and kneading: your first real skill
- Wheel throwing machine + hand technique: learning the balancing act
- Forming “any shape you want” (with teacher guidance)
- You finish with three choices
- Getting Your Pieces Glazed and Fired: What the Waiting Really Means
- What’s included vs what isn’t for the final product
- A helpful detail if you’re budgeting for finishing
- Price and Value: Is $50 a Good Deal?
- What You’ll Likely Do in the Workshop (and How to Get Better Fast)
- Staff and Communication: The Part You Can Control
- Where You Go and How to Fit It Into a Bali Day
- Transportation, lunch, and time planning
- Who This Class Is Best For
- Should You Book This Wheel Throwing Class?
- FAQ
- How long is the wheel throwing class?
- Where does the class start in Bali?
- What’s included in the $50 per person price?
- Can I take my ceramic home the same day?
- How many pieces can I bring home?
- Is transportation included?
Key highlights worth your time
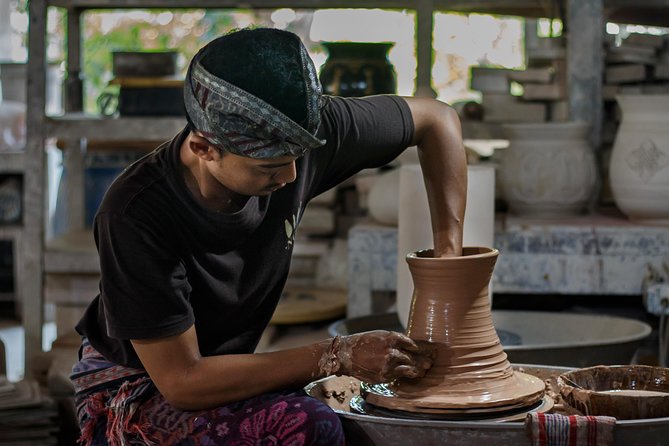
- Hands-on wheel throwing and hand-balancing: you learn how to form shapes, not just how to spin clay
- Work with scaled clay up to 3 kg: enough to experiment before you commit to the final pieces
- Choose up to three take-home creations: you select your best forms for the finishing process
- Factory setting you can see and ask questions about: tools, materials, and machinery are part of the visit
- Glazing and combustion happen after class: plan on waiting for your fired pieces
- Friendly instruction with real guidance: you’ll get help, especially with getting started on the wheel
Wheel Throwing in Ubud: Why This Class Feels Practical
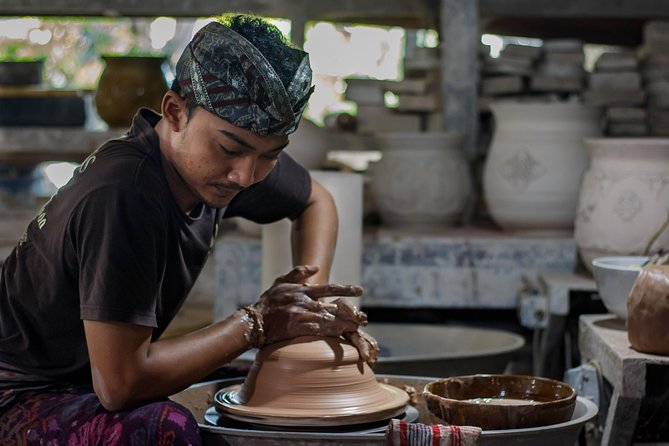
Ubud is full of things to do, but this ceramic class has a straightforward goal. You’re going to learn the basics of making pottery on a wheel—using a wheel-throwing machine—while also doing the hand technique that helps the form take shape. That mix matters. The wheel provides motion. Your hands do the shaping and balancing.
The location also helps. Instead of a demo room, this is held in the instructor’s own factory. You can see the tools, materials, and machinery used in their day-to-day ceramic work. For me, that turns the class from a one-off craft lesson into something closer to “try the trade.”
Price is also fairly easy to understand. At $50 per person for about 3 hours and all materials provided, it’s not trying to upsell you into a long, complicated workshop. You pay for the experience time, and you’ll handle the long finish afterward if you want glazed and fired results.
You can also read our reviews of more tours and experiences in Ubud



What Happens During the 3 Hours (From Kneading to a Real Form)
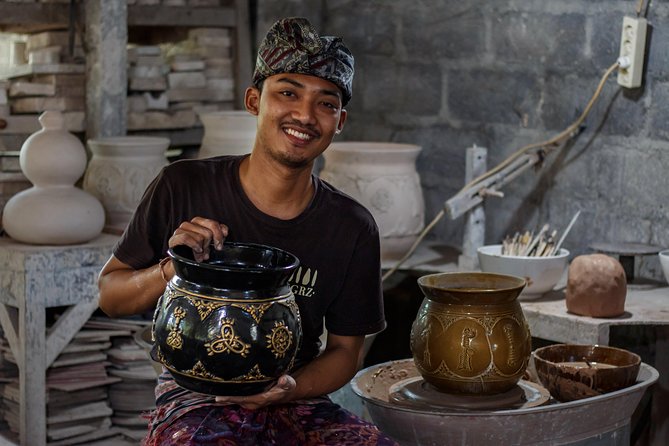
The class runs roughly 3 hours, and it has a clear progression: you start with clay preparation, then you move into wheel use, then you finalize your best shapes for the take-home selection.
Clay scaling and kneading: your first real skill
It starts with the basics: scaling and kneading the clay. This is where you learn the material side of ceramics. The idea is to get the clay ready for the wheel so you can actually form it, instead of fighting lumpy texture.
The class information describes working from about 2,000 grams of clay into the ceramic shapes you want. At the same time, the workshop also notes you’ll be experimenting with up to 3 kg of clay. Either way, the practical point for you is this: you’ll have enough clay to practice shapes rather than just producing one rushed cup.
Wheel throwing machine + hand technique: learning the balancing act
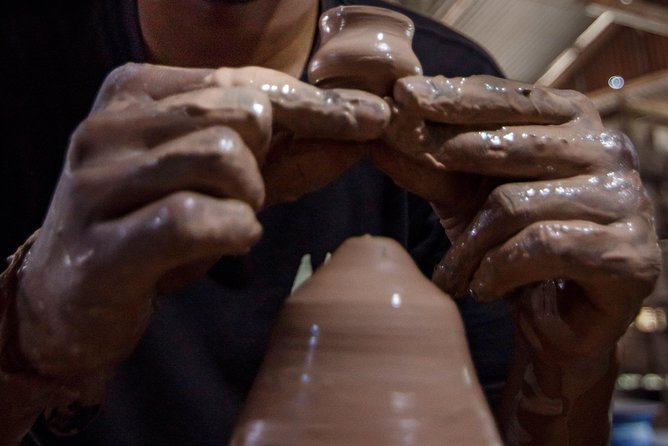
Next comes the core lesson. You use the wheel throwing machine, but you’re not doing it like a hands-off factory process. You’re learning a hand technique to solid the clay and form it into the shape you want. The class also mentions basic knowledge of the machine, plus hand balancing while the clay forms.
This is the part where most people want to know how it actually works. Wheel throwing is physical and a bit technical. Your hands control thickness and shape, and the wheel speed helps the clay stay workable. Even if you’re a first-timer, the class is built to walk you through the fundamentals rather than dumping you at the wheel and hoping you figure it out.
Forming “any shape you want” (with teacher guidance)
The workshop says you can form the ceramic into any shape you want, and you can experiment. In real terms, that means you’re trying to make something that looks like what you imagined—while learning the basics to get there.
One note from feedback that’s useful for your expectations: instructors may do a fair amount to guide you. That doesn’t mean you’re watching. It means that the first time on the wheel can be tricky, and the goal is to help you get workable forms rather than leaving you stuck. If you want maximum DIY time, you can still push for more hands-on coaching—ask questions early.
You can also read our reviews of more tours and experiences in Ubud

You finish with three choices
By the end of class, you’ll pick the best three creations to bring home. The class limits the take-home pieces to three, based on the ones you select during the combustion and glaze workflow. If you create more during experimentation, you’ll still be sorting through your results to decide what’s worth finishing.
Getting Your Pieces Glazed and Fired: What the Waiting Really Means
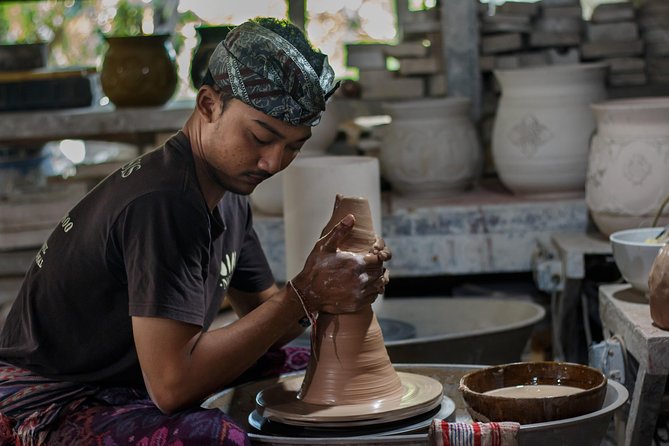
Here’s the big practical part: the class itself is only the start of your final ceramics.
The information is direct that combustion and glaze for the limit to three creations takes 1 week up to 4 weeks. In other words, you’re taking home finished pottery later, not immediately at the end of the 3-hour session.
The class also notes that combustion is part of the finishing process, and it’s not included in what you pay for the class. That matters for value. You might think your $50 includes everything that makes clay into ceramic. It doesn’t.
What’s included vs what isn’t for the final product
Included during the class:
- wheel throwing machine usage
- materials, including clay (scaled for the session) and coloring materials if you want variety
- bottled water
- an apron
Not included:
- the combustion process for the final product
This is the part to plan around. If your main goal is a takeaway you can gift immediately, a ceramic class with delayed firing might feel annoying. If you’re okay treating this as a souvenir you’ll receive after your trip, it can be a very fun way to get something personal.
A helpful detail if you’re budgeting for finishing
One piece of feedback came with a response from the provider clarifying the baking situation. The statement says baking pieces fees are not included, but they would give one piece free of charge. That’s the kind of practical note you should treat as a “ask them to confirm” detail, not a guarantee you should ignore.
If you book, I’d suggest you confirm exactly how that free piece works for your specific booking and how many pieces are being handled for finishing.
Price and Value: Is $50 a Good Deal?
At $50 per person for around 3 hours, this class is priced like an entry-level hands-on workshop: you’re paying for time, instruction, and materials during the forming stage. That’s the value engine here.
Where value can get confusing is the ceramics finishing. Since glazing and combustion take 1 to 4 weeks and combustion is not included, your all-in cost depends on how much you want to pay for firing and glazing for your chosen pieces.
So you should judge the deal like this:
- If you want to experience wheel throwing and make your own forms, the class price is strong.
- If you expect fired and glazed ceramics included in the same $50, you’ll feel surprised.
In one feedback example, the “not included” aspect affected satisfaction because the expectation was that baking pieces should be part of the package. To avoid that, treat the class as the making session, not the final firing package.
What You’ll Likely Do in the Workshop (and How to Get Better Fast)
Even with guidance, wheel throwing is not a video game. It’s messy, physical, and timing-sensitive. The good news: the class structure helps you start in the right order—prepare clay, learn machine basics, then form your shapes with hand technique.
Here’s how I’d approach it if you want the best results from the limited time:
- Pay attention during scaling and kneading. If the clay isn’t ready, everything afterward feels harder.
- Watch the machine basics early, then ask for a quick correction before you start shaping.
- Experiment enough to know what you like, but don’t spread your energy too thin if you need three strong pieces for the final selection.
Also, keep in mind that in at least one case, the session ran short—finishing two hours early in that instance. That could mean you get extra time for shaping and selecting. Or it could simply mean your group progressed quickly. Either way, show up ready to work hard for the hours you have.
Staff and Communication: The Part You Can Control
The instructor and staff are described as friendly and willing to help with skills for new creations. That’s exactly what you want in a first wheel-throwing experience. You don’t need a speech. You need corrections, tips, and quick help when your clay starts to fight back.
The less fun part in feedback was communication involving the booking platform rather than the studio itself. In that case, there was trouble getting responses when emails and calls were made, and the group had to find the property with help from someone local.
What you can do:
- Confirm your meeting point clearly before you go.
- If you don’t hear back quickly, don’t keep waiting indefinitely—get local help to locate the factory.
You’ll have the meeting details up front, and you’ll be able to end back at the meeting point after the activity.
Where You Go and How to Fit It Into a Bali Day
You meet at Jl. Nakula No.511, Guwang, Kec. Sukawati, Kabupaten Gianyar, Bali 80582, Indonesia. The class ends back at the meeting point.
The class also states the activity requires good weather. That’s not about the wheel itself. It’s about getting you there comfortably and safely.
Transportation, lunch, and time planning
Private transportation is not included. Lunch and snacks are also not included. Bottled water is provided in the session, and you’ll have an apron while you work.
Since the class lasts about 3 hours, plan your day with a little buffer around it—especially because your final pieces won’t be ready right away. If you’re the type who likes to schedule tight tours back-to-back, adjust your expectations here. This is a hands-on making session with a later payoff.
Who This Class Is Best For
This is best for you if:
- you want a real craft experience with instruction, not just a sightseeing stop
- you like making something tangible that’s tied to your own hands
- you’re okay waiting 1 to 4 weeks for glaze and firing to finish your ceramics
It’s less ideal if:
- you need the final fired and glazed pieces right away the same day
- you expect everything related to baking/combustion to be included in the base fee
- you hate situations where communication might depend on you confirming details early
The good news is that the workshop notes most travelers can participate, and it’s private for your group. So even if you’re traveling with friends or family, you can do it without a large crowd.
Should You Book This Wheel Throwing Class?
I think it’s a solid choice if you want hands-on wheel throwing in Ubud and you can live with the delayed finishing. The class gives you enough clay to practice, teaches wheel and hand technique, and lets you select up to three creations to finish. The factory setting also gives it a more authentic feel than a one-room craft demo.
But book with your eyes open. The combustion process for final product is not included in the listed class price, and glaze/firing takes weeks. Confirm what you’ll pay for finishing and how the offer of one free piece (mentioned by the provider) applies to your booking.
If you want something you can do that’s tactile, creative, and very Bali-appropriate, this one earns its place on your list.
FAQ
How long is the wheel throwing class?
The class is about 3 hours.
Where does the class start in Bali?
You start at Jl. Nakula No.511, Guwang, Kec. Sukawati, Kabupaten Gianyar, Bali 80582, Indonesia, and you end back at the meeting point.
What’s included in the $50 per person price?
You get all materials during the class (including clay scaled for the session), wheel throwing machine usage, coloring materials if you want variety, bottled water, and an apron.
Can I take my ceramic home the same day?
No. Combustion and glaze for the final product take about 1 week up to 4 weeks.
How many pieces can I bring home?
You can bring home your creations, limited to the best three pieces you select.
Is transportation included?
Private transportation is not included.